First of all, you should have a live CD or a requested Ubuntu Desktop edition to process with this. I prefer a new hard disk to install Ubuntu for the first time, because it’s nothing to panic with the probability of losing your data in the other partitions or disks. (That’s what I did; my next post will be about dual boot settings)
So:
1.Request an Ubuntu CD (Free Linux) from www.Ubuntu.com OR
2.Download Ubuntu from the same website and make an Ubuntu live CD
3.Buy a separate hard disk about 10GB of capacity (make dual boot settings)
-->
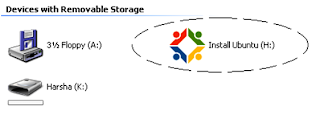
And following box will be shown on your screen.
- Click on ‘Install Inside Windows’ and you’ll see the following:
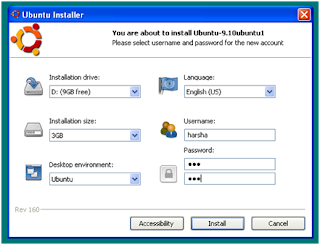
- Remember! Select the appropriate installation drive from the drop down menu and select minimum 3GB of space to compress and install Ubuntu which will take some time more than normal.
- You can add your name and password. Usually, as this is inside windows the user name in windows has taken as the default value.
- You’ll see the above after you click on ‘Install’.
- CD would come out of the Rom. Then it is asked to reboot the computer. Click yes and it will straight go to Ubuntu, but remember to select Ubuntu in the dual boot process.
- After that it’s all about an automatic process. The package which was installed inside windows in the separate hard drive performs and getting installed as an operating system.


2 comments:
පරණ වුනත් 10.1 සහ අලුත් ඉන්ස්ටෝල් කිරීම අතර ඒ හෑටි වෙනසක් නෑ.එක වගේම තමා.
Good, Thank You!
Post a Comment